User:Wolfsbane/Sandbox: Difference between revisions
| Line 153: | Line 153: | ||
There are three types of spawn area available. Trader and Pirate spawns are the normal spawn points, and do what you expect them to. Traditionally the pirates spawn 100m - 200m behind the traders, but you could try some more unorthodox things if you want. Bear in mind that a head-on spawn will (I believe) put the players in the pirate spot, with the AIs facing them in the trader spot. | There are three types of spawn area available. Trader and Pirate spawns are the normal spawn points, and do what you expect them to. Traditionally the pirates spawn 100m - 200m behind the traders, but you could try some more unorthodox things if you want. Bear in mind that a head-on spawn will (I believe) put the players in the pirate spot, with the AIs facing them in the trader spot. | ||
These types of spawn consist of a SimGroup named in the form PlayerDropPoints1Pirate or PlayerDropPoints1Trader, which contains four SpawnSpheres. These mark (in order) the front-left, front-right, rear-left, and rear-right corners of the area. | These types of spawn consist of a SimGroup named in the form PlayerDropPoints1Pirate or PlayerDropPoints1Trader, which contains four SpawnSpheres. These mark (in order) the front-left, front-right, rear-left, and rear-right corners of the area. | ||
[[File:MBW_Screen21.jpg]][[File:MBW_Screen22.jpg]] | |||
''Traders(left) and Pirates (right)'' | |||
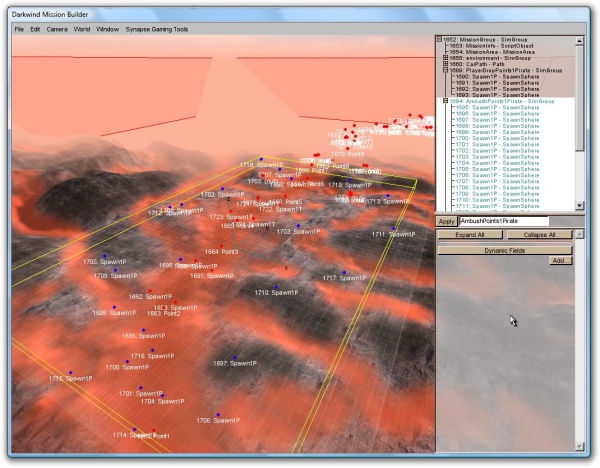
The third type is the ambush, named in the form AmbushPoints1Pirate. These are optional, but I like to add one to each spawn point, just to stop people getting complacent. These consist of 25 or more SpawnSpheres, which each give the position and facing of a single car. | The third type is the ambush, named in the form AmbushPoints1Pirate. These are optional, but I like to add one to each spawn point, just to stop people getting complacent. These consist of 25 or more SpawnSpheres, which each give the position and facing of a single car. | ||
[[File:MBW_Screen23.jpg]] | |||
''Ambush points'' | |||
You can have as many spawn areas as you like, just keep increasing the number. One nice trick (which I didn't think of when making Oil Slick, unfortunately) is to add spawns at both ends of your path, facing towards the centre. Driving the map in both directions adds a bit of variety, and it means players will be seeing all that nice decration you added from both sides. | You can have as many spawn areas as you like, just keep increasing the number. One nice trick (which I didn't think of when making Oil Slick, unfortunately) is to add spawns at both ends of your path, facing towards the centre. Driving the map in both directions adds a bit of variety, and it means players will be seeing all that nice decration you added from both sides. | ||
Revision as of 22:30, 30 November 2010
Creating a Wilderness Map
Terrain Generation
Unlike race tracks, the whole area is important. Players will be able to go everywhere, so we need to make sure there's something interesting in every direction. The first thing to do is to look at other maps in the area, try and work out how they were created.
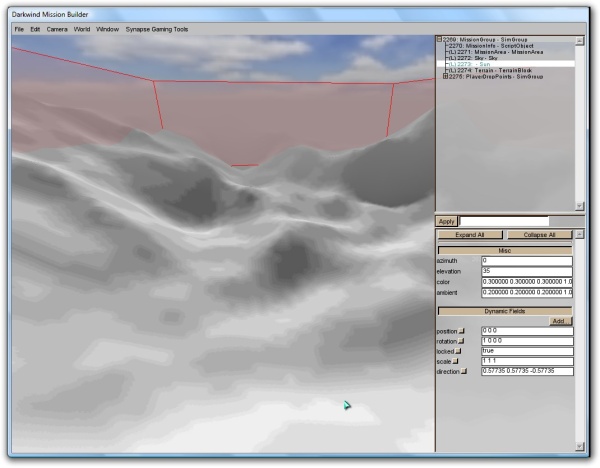
I'll be using an empty map to demonstrate these transformations. The sun has been turned down to reduce glare, and fog is reduced.
Green outline - terrain repeats. Can change size of area.
Terrain terraform editor mode. Two types of transformation - generators and modifiers. They work in order from top to bottom, and can be layered to produce complex effects.
Generators
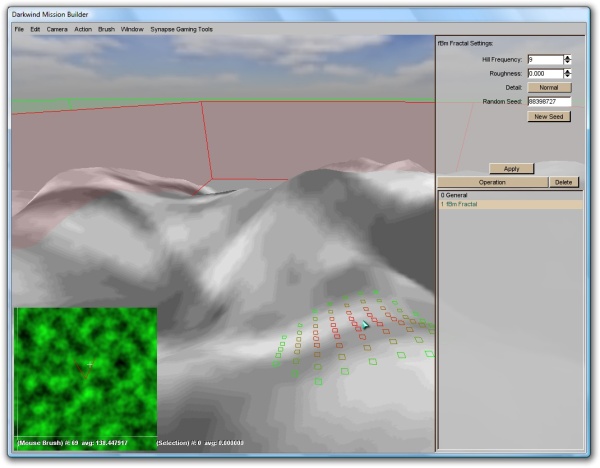
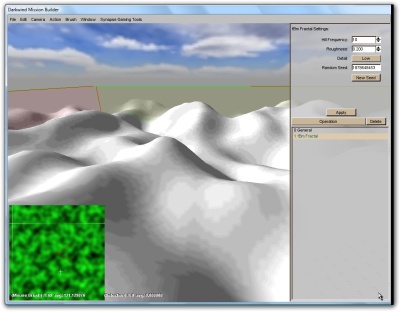
Generators override the terrain, and wipe out everything above them in the stack. No point using more than one of these. The "New Seed" button gives a different random terrain. The green minimap in the bottom left shows a preview of the terrain that will be generated.
- fBm Fractal - basic hilly terrain. Hill frequency is (more or less) the number of hills in the area. Roughness is the steepness of the hills (I think - it doesn't actually seem to do much). Detail adds smaller hills between the large ones. This is the most useful generator for most areas.
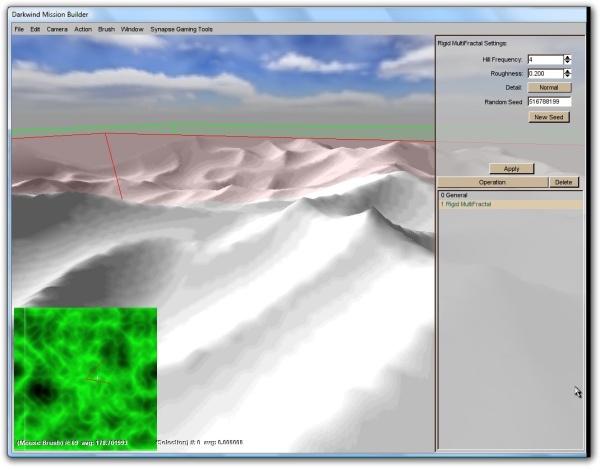
- Rigid MultiFractal - produces ridges or sand dunes. This is used for most of the terrain along the SS-Elms route. Frequency and detail as above.
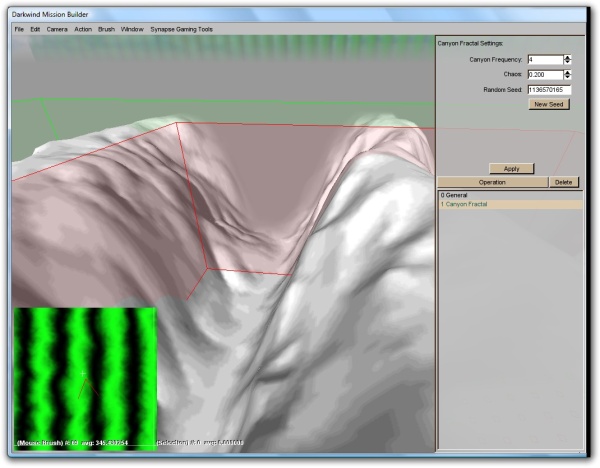
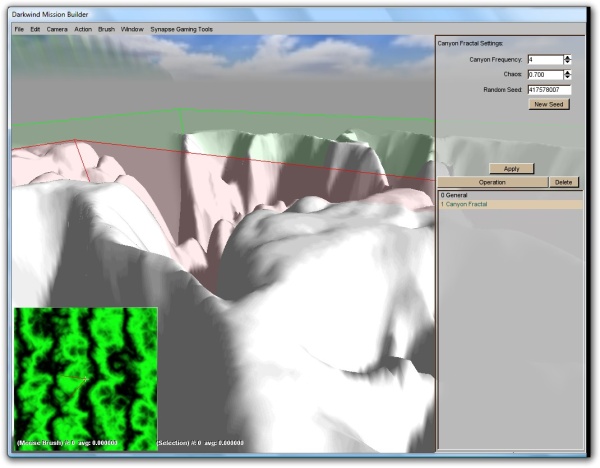
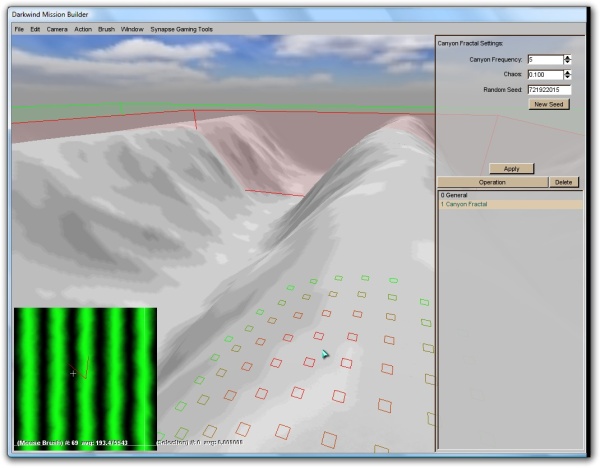
- Canyon Fractal - Produces steep-sided canyons. Think of Sarsfield, or The Maze. Chaos adjusts how winding the canyons are. With low numbers of canyons and moderate roughness, this can produce rolling hills.
Low Chaos
High Chaos
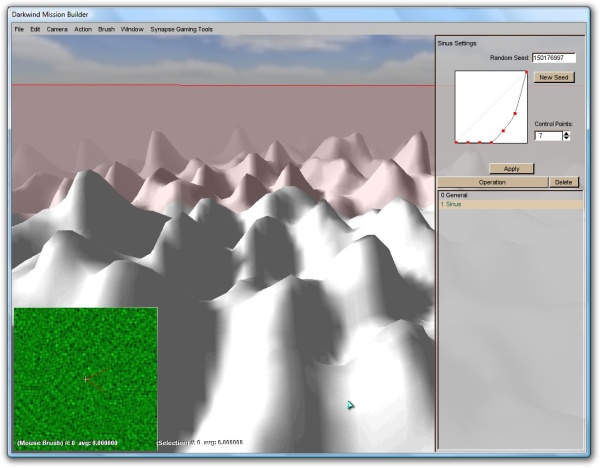
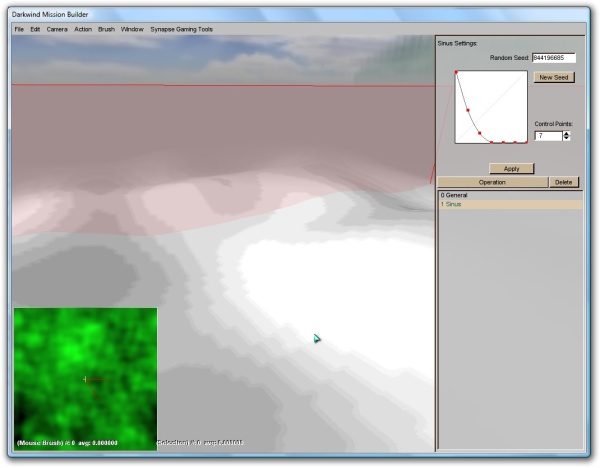
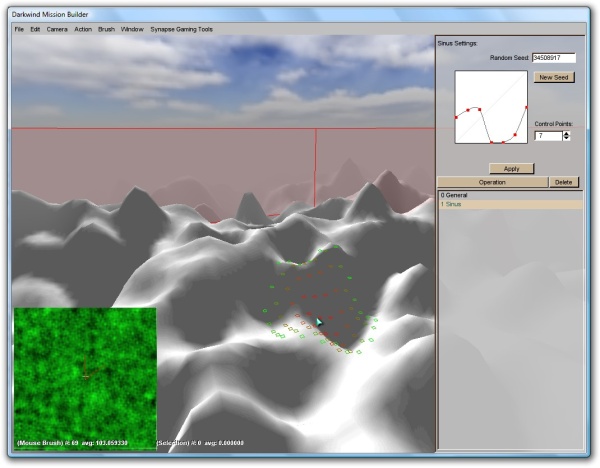
- Sinus - produces small bumps all over the map. The graph will be important for a lot of operations, so it's worth explaining how it works. The height of the graph shows how much of that size effect will be part of the final terrain - large bumps on the left, small ones on the right. A couple of examples:
Small Ripples
Large Ripples
Varied Ripples
- Bitmap - claims to use an 8 bit bitmap as the base for a terrain. Unfortunately I can't work out which folder it looks in for bitmaps. Anyone who works it out, let me know.
Modifiers
- General - sets max and min terrain height. This is the biggest effect on the "hilliness" of the terrain. This is always the first transformation, and can't be deleted.
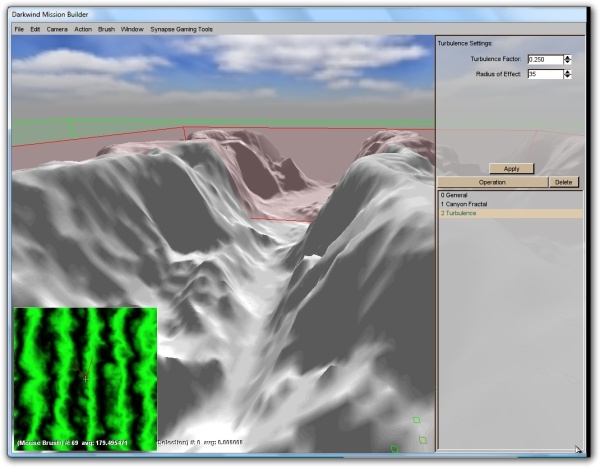
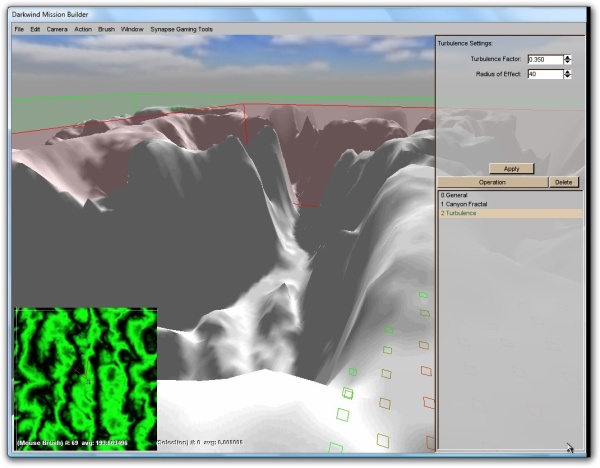
- Turbulence - adds extra noise and roughness to the terrain. It gives a twisting sort of effect. Requires clicking on a higher level and back before seeing any effects.
No Turbulence
Light Turbulence
Heavy Turbulence
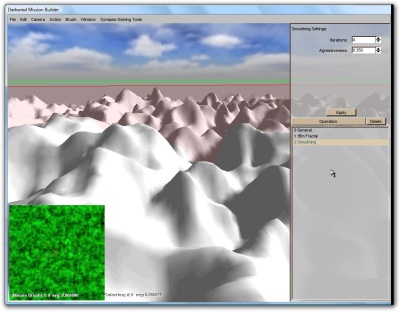
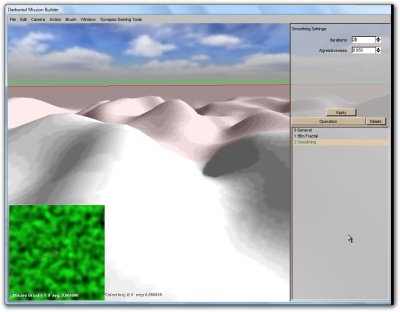
- Smoothing - the opposite. Smooths out rough edges and makes a more even, rolling terrain. Number of iterations has the biggest effect on the outcome.
No Smoothing
Light Smoothing
Heavy Smoothing
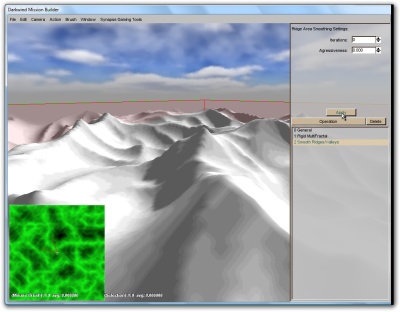
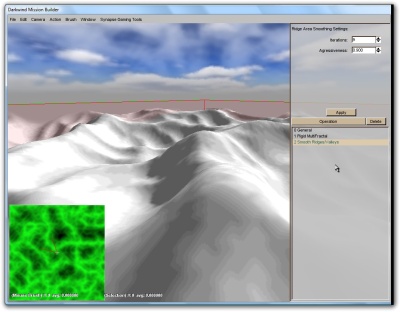
- Smooth Ridges/Valleys - smooths only the top of mountains and ridges. Useful to avoid sharp peaks that cars have trouble driving over.
No Smoothing
Heavy Smoothing
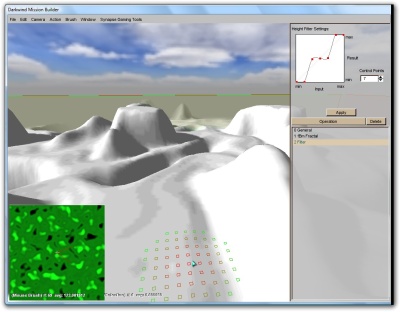
- Filter - applies a transform based on the height of the terrain - each input height can be linked to an output. There are all sort of complex effects that can be achieved like this, although I haven't experimented much.
The original terrain
Filtering used to set the terrain to three levels
- Thermal Erosion/Hydraulic Erosion - don't appear to do anything. Let me know if you work it out.
Automatic Texture Generation
Painting the whole map by hand would be slow and impractical, so unless we just want uniform sand we need to automatically paint textures. This is more art than science. I've managed to get it to work, more or less, but I'm not sure exactly what the rules are.
Use the add material button to add textures to your level. They come with a standard fractal distortion, just to add a bit of roughness to the edges and make the whole thing appear a little more natural. There are two additional placement options:
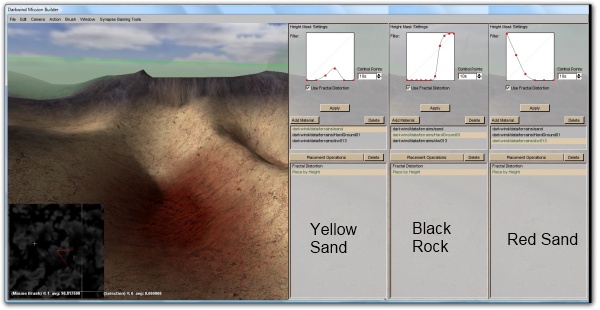
- Place by Height - Good for putting rock textures on the tops of hills, or underwater textures at the bottom of pools. Here's a quick example:
You can see that the sand is restricted to the middle layer, with red sand at the bottom of pits and black rock at the top of the hills.
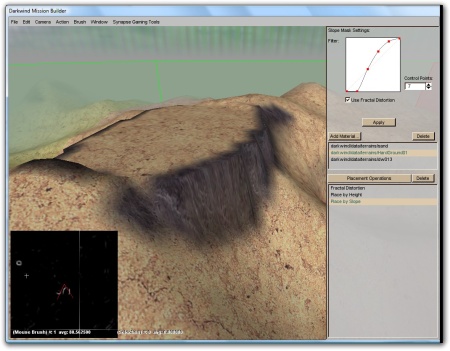
- Place by Slope - Best used in combination with place by height. In this example, the black rock has been set to large slopes only, so the plateau on top reverts to the yellow sand.
Sculpting the Map
The techniques here are the same as for the race track above. Try to look at the track as you would playing it. I consider any easy straight route that loops to be a bit of a flaw, unless you intend them to be there.
It's up to you how much of this you want to do. Some maps are just a few tweaks on top of a generated terrain, whereas some (The Pits is a good example) are largely built by hand.
Regenerating Textures
If you adjust the terrain and want to automatically texture it, you'll need to swap into Terraform Editor mode and back out again before your changes are recognised. There are actually a few situations like this, and swapping between modes or turning fractal distortion off and on again usually fix them. If not, you may need to quit and restart.
Decorations
Again, this is covered in the race track section. Adding just a few trees or shrubs can make a big difference.
Note that even though the terrain will loop, the objects won't be recreated. You can put objects outside the mission area though, which is a good idea if you have something like a bridge.
Car Paths and Spawn Areas
This is the major technical difference between a wilderness map and a race track. Like the track, car paths are needed to direct the AIs along your roads (not that they pay any attention, but you have to make the effort). However the form of the path is different and you may need more than one. You will also need multiple spawn areas, along with ambush points.
Car Paths
The simplest maps (which is most of them) have a single car path that follows a single road across the map. These are by far the easiest to make. Make a path just like you would for the racetrack, but instead of a loop you want a single line from one edge of the mission area to the other. The AI will head the first waypoint on the next repeat of the map when they get to the last waypoint on this repeat, so make sure the two points are close to each other. You also need to make the points big enough that the AIs won't miss them if they're driving slightly off road.
More complex maps may have multiple car paths that join and split it complex ways, but I can't help you there. Have a look at the gates of SS if you want an idea of how bad it can get. Then just stick to making maps with a single road on.
Spawn Areas
There are three types of spawn area available. Trader and Pirate spawns are the normal spawn points, and do what you expect them to. Traditionally the pirates spawn 100m - 200m behind the traders, but you could try some more unorthodox things if you want. Bear in mind that a head-on spawn will (I believe) put the players in the pirate spot, with the AIs facing them in the trader spot. These types of spawn consist of a SimGroup named in the form PlayerDropPoints1Pirate or PlayerDropPoints1Trader, which contains four SpawnSpheres. These mark (in order) the front-left, front-right, rear-left, and rear-right corners of the area.
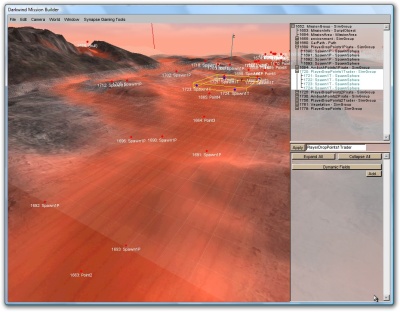
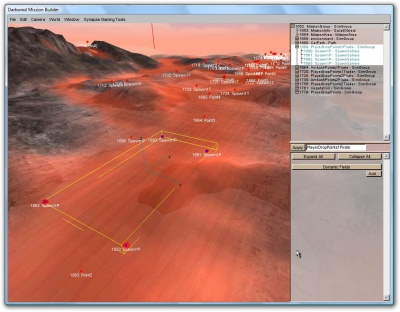 Traders(left) and Pirates (right)
The third type is the ambush, named in the form AmbushPoints1Pirate. These are optional, but I like to add one to each spawn point, just to stop people getting complacent. These consist of 25 or more SpawnSpheres, which each give the position and facing of a single car.
You can have as many spawn areas as you like, just keep increasing the number. One nice trick (which I didn't think of when making Oil Slick, unfortunately) is to add spawns at both ends of your path, facing towards the centre. Driving the map in both directions adds a bit of variety, and it means players will be seeing all that nice decration you added from both sides.
